PenCT Help -- Simulation Parameters |
||
|---|---|---|
| Introduction -> Phantom -> System Geometry -> Spectrum -> Simulation Parameters -> Other Information | ||
|
The primary task of penCT is to generate files that can be used as input files for penEasy. Every penEasy simulation needs an input file, and a single simulation corresponds to a single x-ray projection. Therefore, penCT must create one input file for each projection in the CT scan, as well as a geometry file for the system. penCT also generates some helper files to facilitate the use of penEasy. When the "Generate Files" button is pressed, these files will be created:
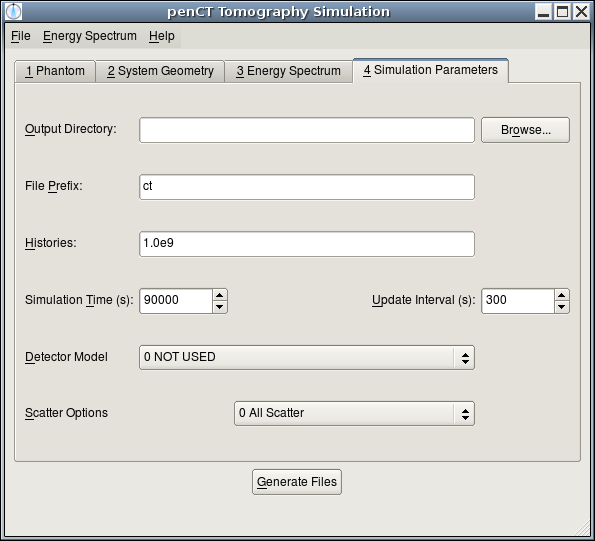
Output Directory: All of the output files will be written to this directory. You can type in the desired directory or click the "Browse" button to search for the directory. File Prefix: Every generated file will begin with this prefix. After the prefix will be numbers for each projection and the filetype. For a single phantom simulation, the file names will be as follows:
Histories: This field allows you to choose the number of primary x-rays that will be simulated. The field must be numeric in scientific notation. This field is not used if "Ideal Ray-Tracing" is used as the detector model. Simulation Time: This field places a limit on the total run time of the simulation. Typically, the simulation will end after it has simulated the specified number of histories. Maximum Offset Angle: This number is the maximum angle of rotation, d, from the normal projection angle. The normal projection angle is considered to be 0, and the simulation will run from -d to +d degrees. Number of Projections: This defines the number of projections that will be generated. They are distributed regularly across the rotation arc described above. It is important to note that the normal projection angle will only be captured if the number of projections is odd.
Detector Model: Here you can choose the type of particle that penEasy will track. "3-Ideal Ray-Tracing"
should be used initially to check the geometry. In this case, penEasy will perform a line integral through rays from
each pixes to the source. This simulation runs very quickly. Scatter Options: If you have chosen "1-Standard X-Ray" for the Detector Model, you can then choose how to capture the scatter in the projection images. "0-All Scatter" will capture an image like a typical x-ray. "1-Primary Only" will only track primary particles with no scatter. "2-Separate Scatter" will capture all scatter and provide 5 images of each projection: primarly particles only, single Rayleigh scatter, single Compton Scatter, multiple scatter, and the full monte-carlo image. | ||
| Previous | Next | |